Monday, August 13, 2007

Workshop 4: ISO


ISO/ ISO equivalent

ISO (equivalent) speed on a digital camera gives an indication of the sensitivity of the image sensor.

Some uses

If by adjusting the shutter speed / aperture combinations you cannot obtain a correctly exposed picture (usually in low-light situations), then you may want to select the next higher ISO.


Noise

ISO usually results in noisy images because of the high sensitivity.

ISO speed and image sensor size

The size of the image sensor determines the ISO speed range that a digital camera can use without suffering from undue noise. Image sensor (of same resolution) that is smaller will exhibit more noise at higher ISOs than the larger one.

S2IS has ½.5” sensor size

Notes:

  1. You obtain the best image quality by using the lowest ISO possible on your digital camera. If you want to ensure your digital camera always uses the lowest ISO setting, switch the ISO setting from the default "Auto ISO" (this setting is usually found in the Menu) to the lowest possible on the camera, say ISO 50.

Here's another good one that I got from A-mountain in Tempe.
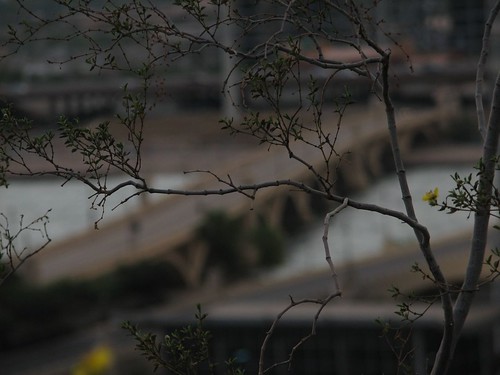
The Bridge
References:

http://www.photoxels.com/tutorial_iso.html

Tuesday, August 7, 2007

Workshop3: Shutter speed and Aperture settings

There are plenty of references on the web for this topic. I do not want to repeat the explanation. I’m listing down some really useful references here which will explain the concept. Well, I worked a lot on this! My album doesn't really reflect that coz I keep deleting the photos that I am not satisfied with.


My notes:

1. Use as small shutter speed as possible and compensate exposure by aperture; bigger the shutter speed, more the blurry effect.

2. Always think of what depth of field you want to use:
- W
ider the aperture (or smaller F-# like F2.8) smaller the DOF (refer previous post also)

- Using Reciprocity to Compose Your Image:
You can adjust the aperture setting and shutter speed to create several different correctly exposed images. The relationship between the aperture and shutter is known as reciprocity. Reciprocity gives the photographer control over the depth of field of the image, which controls the area of the image that remains in focus. This is the easiest way to control what part of the image you want the viewer to pay attention to.

3. Technically what exactly is f-stop?

An f-stop is a ratio of the focal length of the lens to the diameter of the opening of the aperture. For example, a 50 mm lens with an aperture opened up to a diameter of 12.5 mm results in an f-stop of f4 (50 ÷ 12.5 = 4). Therefore, the larger the numerical value of the f-stop, the smaller the opening of the aperture.
4. You can eliminate camera shake by using a tripod or by increasing the shutter speed to a value higher than the focal length. For example, if you’re shooting at a focal length equivalent to 100 mm, you should set your shutter speed to 1/100 of a second or faster. The digital image sensor will capture the image before the movement of the lens has time to register additional light information on the sensor.

As per my understanding till now, ‘Exposure’ is a result of three settings:

- Shutter speed

- Aperture

- ISO

A very useful and extensive documentation of various exposure settings: http://www.fredparker.com/ultexp1.htm - This may not make much sense until we study ISO too!

And, btw... what role does white-balance play in all this? Hmm, will add it to 'yet-to-do' list!

Other References:

http://www.photonhead.com/beginners/shutterandaperture.php

Monday, July 23, 2007

Way to go....

Time has come when I realized that my sweetheart, my camera (s2 IS) isn't that great :P.... Aperture range is just F2.7 to F8... uf... ! Not good, but I want to utilize lot of things in this one before I upgrade to an SLR.

Topics (yet) to work on:

- Using Aperture, Shutter, both together (covered)

- Adjusting/ locking exposure: ISO (covered)

- Understanding how and when to use white-balance settings

- Using manual focus, focus lock & other details about focus (1st, 2nd curtains, etc.)

- Metering systems (types/ ways/ zone system)

- Lenses (types/ uses/ terms)

- How to achieve special effects while shooting (let camera see what we cannot see!)

- Understanding Histograms

- Using Photoshop

- Understanding RAW image format

Special scenes:

- Macro photography

- Landscapes/ flowers/ trees/ nature

- Portraits

- Indoor objects

- Reflections

- People and places

- Unique architectures

- Bright light photography

- Night photography

- Sports photography

- Food Photography

- Night sports photography (most difficult with my camera :( )

- Capturing TV screens

Well, I do not intend to master in all of above photography types…. But, well…. need to be decent in most of them. Most of the times when I take long time to adjust the camera, my husband teases me “what kind of a photographer you are” (Well, I’m not, yet! :P). Like yesterday, he was playing with his remote-controlled helicopter and asked me to take some good photographs. God… it was so difficult… time was around 7 in the evening, kinda dark. The tricky part was to capture helicopter motion (needs high shutter speed) in the dark (needs low F-number to compensate the high shutter speed). Now, my camera (which I loved till now!) does not support F-numbers lower than F2.7, so I had to use flash to provide light. Now the problem is flash coverage…. I had to go closer to the subject, rather I had to request my subject (hubby) to stay closer to second subject (helicopter).

Too bad, this spoils the whole fun of taking natural pictures…. I’m highly disappointed with my self… but keeping spirit, since I never loose hope… I believe, one day I’ll be able to capture someone playing with the helicopter… that day could be long enough and the one playing with remote could be my kid (:D).

Saturday, June 30, 2007

Workshop 2: Composition of picture

This isn’t that simple as it sounds :). I loved working on composition. Rule of thirds is just one of the rules of photo composition. Like someone correctly said, the important question to ask is -

"What message do I want my picture to deliver?"

I took some pics to understand and use these rules, but I wasn’t much satisfied with myself. Most of the times, u just want to take picture and u r just not able to figure wats the best angle/ composition for this frame! But let me note down my understanding here.

Rules of composition:

1. Isolate the subject:Don’t clutter the image, else the viewer will be lost and won’t have anything specific to look at.

  • Sometimes adding a secondary focal point makes the picture interesting; like capturing a house as secondary focal point and mountains as first.
  • Sometimes use of two focal points depicts a story

2. Layout, horizontal or vertical: This web page gives a classic explanation of layout to be considered for a picture.

3. Rule of thirds: My previous post

4. Fill the frame: Don’t leave huge empty space, like capturing one small tree and huge portion of sky.

5. Use lines/ symmetry patterns, always keep horizon/ water level straight

6. Diagonal rule (Explanation)

One side of the picture is divided into two, and then each half is divided into three parts. The adjacent side is divided so that the lines connecting the resulting points form a diagonal frame. According to the Diagonal Rule, important elements of the picture should be placed along these diagonals:


Linear elements, such as roads, waterways, and fences placed diagonally, are generally perceived as more dynamic than horizontally placed ones:


7. Headroom: Enough room for the subject's head.


8. Give "look-space"/ walking room:
This is space in the frame that is in front of their eyes that allows them room to look or walk. So they don't look like they will bump into the edge of the photograph. Here's a Good Example of Look-Space & Walking Room:


9. Use proper depth of field

There are three main factors contributing toward depth of field:

- Aperture (bigger F-number, bigger DOF)

- Focal length (more magnify, less DOF)

- Subject distance (more distance, more DOF)

Check out the proper description with examples on Sangeetha's post about DOF.

10. Know when to break the rules :)

I've updated photos that I took for this workshop to my picassa web album:


Sangeetha's work on composition is pretty interesting too. I loved the snaps taken by her...

And finally, thanks to the web-resources:

http://photoinf.com/Image_Balance/Larry_Seiler/Composition_-_Understanding_it_-_Using_it.htm

http://photoinf.com/General/Gao_Mu/Introduction_To_Photography_Composition.htm

http://www.azuswebworks.com/photography/ph_comp.html

Tuesday, June 19, 2007

Workshop 1: Rule of thirds

We decided on our first topic: rule of thirds. Apparently this is a very basic funda and does not need knowledge about technical stuff.

Here’s the explanation

One additional interesting point: Place eyes in upper third (http://photoinf.com/General/ITRC_UMT/Composition_Basics_-_How_to_Get_Good_Pictures/Rule_of_Thirds.htm)

And finally, here are pictures taken by me to understand this rule:

http://picasaweb.google.com/amitads/Workshop1RuleOfThirds

Sangeetha's photos: http://www.conceptmall.net/TheShutter/main.php?g2_itemId=140

Note: I’ve resized all images to smaller sizes and placed a small dot on each photo to show the intersection-point that I was targeting for the subject. I’ve shown the grid in some of the pics. Used Pixia to draw the grid.

Useful resources on web:

http://photospot2004.blogspot.com/2004/07/rule-of-thirds.html

http://www.silverlight.co.uk/tutorials/compose_expose/thirds.html

http://www.betterphoto.com/exploring/tips/thirds.asp

http://digital-photography-school.com/blog/rule-of-thirds/

http://www.photozone.de/4Technique/compose/third.htm

Finally a blog about photography!

I have always been attracted towards photography, right since I was a kid. My dad always promised me to buy a Olympus camera (that was the hot one at that time!) and never fulfilled the promise :(
Anyway, I don’t want to be sad here …  I started loving this art more and more when I bought my first camera, my Canon S2 IS. Ahh, it is just too good… in fact Shantanu started liking photography only after we got this one at home!
Some friends sometimes praise me about the snaps that I take and I always reply, “It’s not me, it’s the camera”.

Well, I do wish to learn more and be decent in this field, not to make a profession but for the simple pleasure of art. Here’s one step towards becoming a better photographer. Thanks to Sangeetha for taking the initiative. We both have decided to learn photography fundas together, one by one. Hopefully this endeavor will help me be consistent, learn faster and learn better. I’ll post the topics we studied and my understandings on this blog.

I haven’t opened an account in any of the sites like http://www.treklens.com till now. I want to compare few more sites with treklense, anyone any ideas?